Dumb Things I Have Done Lately

Friday, May 01, 2009

Building a Kick-Ass PVC Fig Rig That I Hope to Use Someday

DSCF5992
So, what's it all about, then? Read on.

It's been just about a year since I built my Poor Man's Steadycam, and I've yet to put it to anything resembling real-life use. Mostly because I just don't shoot a lot of video, but also because it's pretty darn heavy to lug around, and it's too unwieldy to skate around with.

Still, I'm intrigued (some might say "obsessed") with techniques to stabilize digital video cameras, and this Saturday is the Baltimore Kinetic Sculpture Race, so I wanted something new.

Enter the Fig Rig
The professionally-built Fig Rig is basically a steering wheel, with the camera mounted in the middle. By gripping the sides of the wheel, you reduce camera shake. Pretty straightforward.

Now, I'd seen the plans on how build a PVC Fig Rig knockoff (here's another version on Instructables), though it seemed to be a bit large, considering I don't have a big little video camera (just the video mode on my point-and-shoot).

The Instructables' entries weren't particularly... instructable, but a quick search pulls up this Flickr set, complete with exploded view so you can see how it all fits together. Even better, a commenter had created his own even more compact version, The Mini DV handlebar, which was just what I was looking for. (Another person, Missile Mike, did a helpful blog entry with a complete parts list and instructions.)

The Build
Of course, I had plenty of 1/2" PVC left over from my Blackjack Table Halloween costume, so I just had to make a trip to Home Depot to pick up the other PVC fittings. I didn't take any build photos since you can just look at the Flickr set, though I guess I should have -- I had to improvise a bit -- the 90 degree joint with the threaded outlet (that serves as the camera mount) only came in 3/4", so I had to get some 3/4"-to-1/2" reducing bushings.

Also, when I finally fit it together, the pieces didn't quite... fit. (Good thing I did the dry fit before gluing everything together.) The 90 degree elbows didn't meet in the middle -- one side was higher than the other, and the ends didn't reach. I ended up changing the design a bit, flipping one around and using a 1/2" coupler to join the ends in the middle, but it's basically the same.

Additionally, for the 1/4" screw mount, I just used the mount from the Poor Man's Steadycam, since I'd done it before, I don't have a quick-release mount, and because my end caps were a little different. (I did have to go back a few times to find the right-sized bolts, though.)

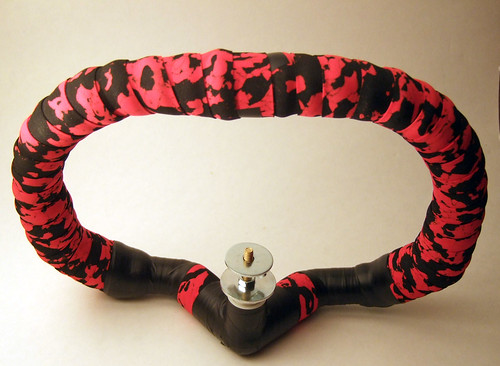
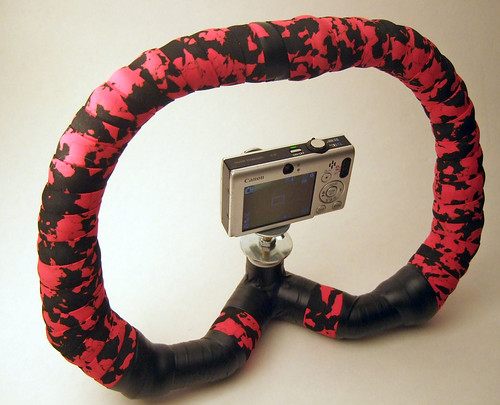
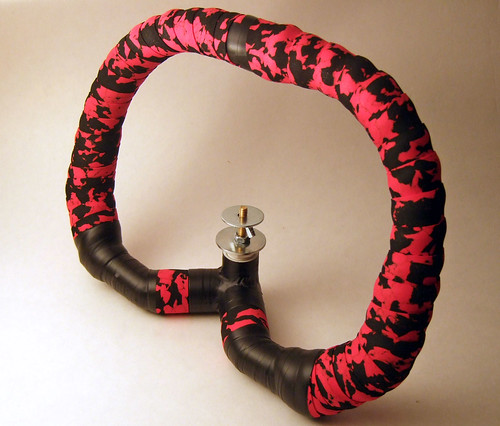
Anyway, here's the final product -- I wrapped it black electrical tape, then red marble-patterned cork bicycle handlebar grip tape, because it looks cool:

DSCF5988
There are two rows of washers -- the bottom row is basically just a spare.

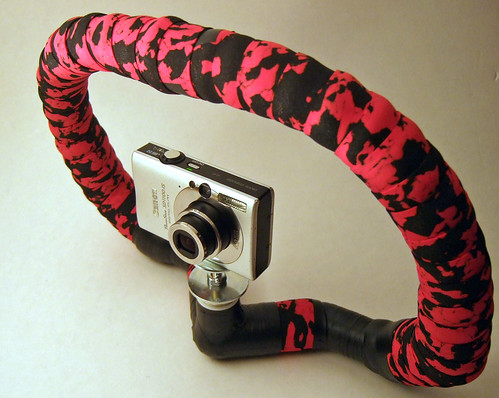
As you can see, it stands on its own:

DSCF5990

With camera mounted:

DSCF5991

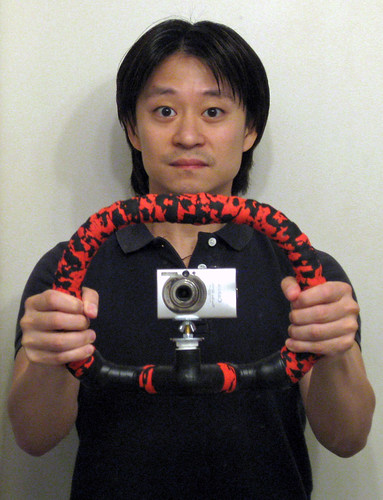
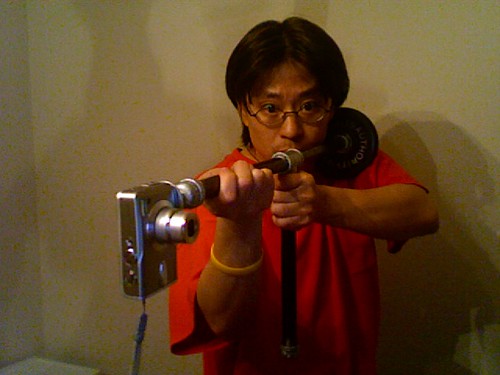
And gripped, in life-like fashion:

IMG_1045

(Note that in a world of self-timers, this is the only acceptable justification for shooting a self-portrait in a bathroom mirror -- when you actually need to show the camera in the shot.)

It feels pretty solid -- sturdy enough to, say, beat a hobo to death with. It's actually one of the reasons I went exclusively with PVC couplings, instead of trying to use my heat gun to bend the PVC (you'd still need a few couplings, anyway) -- everything's short connectors butted end-to-end, so there's no flex in it.

Does It Work?
Um, that's hard to say. I was going to try to test it at Wednesday's kickball game, but we got rained out. Based on some limited indoor testing, I'd say it works better than hand-held, not as good as the Steadycam. We're gonna be cooking with gas when I try it out on Saturday -- hopefully, we won't get rained on too bad, and also hopefully, this scratch in my throat (which is most definitely notnotnot the Mexican/Swine/H1N1 flu, even though I spent a lot of time in Home Depots this week) won't put me on the sidelines.
Labels: ,

Wednesday, October 29, 2008

Wearing My Homemade Blackjack Dealer Costumer (Part 2 of 2)

I built a wearable blackjack table for Halloween. [See Part 1, the build.] Then I got to wear it:

IMG_0194
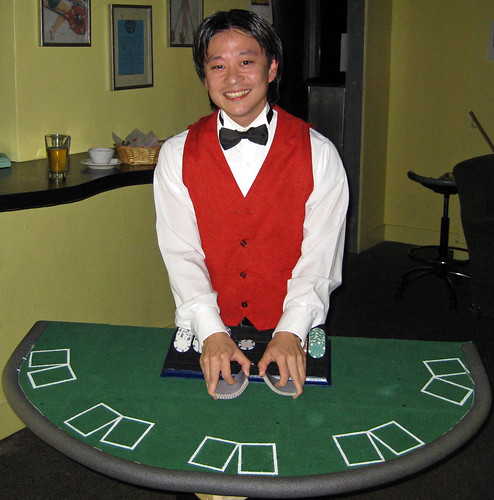
Me, behind the finished product.

I already owned the tuxedo shirt and bow tie. Same with the red vest. (I'd originally sized the harness for a black vest I had, but the red one was wider and hid the harness better, and besides, when you're wearing a 3.5" wide green table, restraint should not be the objective.)

The Wearing
I met a bunch of friends to pre-party before we headed over to Carpool in Herndon, for the Fairfax Athletics Midseason/Halloween Party.

This was actually the first time I'd actually worn the entire, completed costume. It seemed to work okay, once I made it in the door: At about three-and-a-half feet wide, you have to go through sideways (and carefully).

This also makes navigating crowded rooms interesting. The padded rail and a firm voice helps. And when you order a drink, it's best if someone can pass your drink from the bartender.

Observations:
* My costume was very well received. People wanted to know where I'd gotten it. (It was only later -- like, today -- that I found you can buy a cardboard version for $40, but mine was much cooler.)

* Since the harness is almost completely hidden, folks asked how it was held up -- since the platform is at waist level, there's a built-in "I'm just happy to see you" joke.

* Wearing a blackjack table is a good icebreaker -- everyone wants to play:

IMG_0257
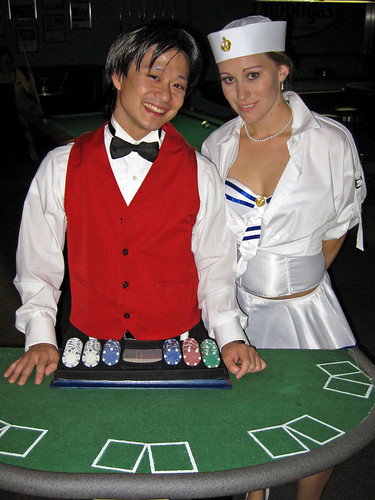
Hey, sailor, new in town?

I dealt a lot of hands to random people over the course of the night, though as time went on, my counting skills (with both chips and cards) deteriorated.

Oh, and to keep things simple, I didn't do insurance, and I was paying blackjack 2-to-1. We weren't playing for real money (didn't want to have to deal with that headache), so who cares?

* It's not really heavy, especially at first, but I definitely started feeling it in my back (I'm still recovering from a mild strain from a few weeks ago). I was a little sore the next day.

* It's pretty easy to take off and put on again, which is an important consideration since I wouldn't want to try taking a leak while wearing it. It would be... messy.

* Initially, I was concerned about sturdiness, but it's pretty solid. The pipe clamps were tight, and the triangle frame supported the platform pretty well. And no one tried leaning on it, thankfully.

* People (myself included) will want to set their drinks down on it:

IMG_0237
Dealing to Harem Girl Michelle

Since the platform is attached and moves with my body, being a drink tray is a potentially dicey situation. I'd thought about adding cupholders, but besides being extra work and having to work around the frame -- hey, people can hold their own drinks.

There were a couple of minor spills, nothing too bad.

* Minor design flaw: If you have short arms, it can be hard to pick up cards at the edge of the platform.

* Happily, even though I'd pre-emptively written off the chips (I only brought half from the set), I didn't lose a single card or chip.

* Lastly, remember: The house always wins:

IMG_0245
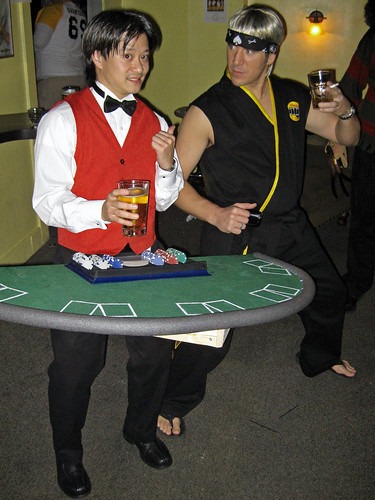
Jeremy "Cobra Kai Johnny" preparing to sweep my leg.

Enhancements and Conclusions
I had a lot of fun with this costume, primarily because it's interactive and fully functional. Oh, and with it, I also won $100 in the costume contest. (Which basically covers my material and tool costs.)

Unfortunately, outside of a party this Halloween night (and maybe Saturday), there doesn't seem like I'll have any excuse to wear it, which is a shame.

I guess I could rent myself out to be a roaming blackjack dealer at parties.

Last week was something of a dry run. In preparation for this weekend's Halloween activities, and after seeing some of the photos, I decided to spray paint black the exposed bits of the frame, because the bare wood looked pretty cheesy. (Incidentally, I found my black spray paint -- it was next to the laundry detergent. No idea why).

I also painted the lower part of the PVC harness -- against black pants, it should be even harder to see. (You can see the PVC poking out in a few of the photos. Well, it's PVC, as far as you know.)

Other enhancements I'm considering -- cutting in a casino-style money drop slot, and painting more decorations on the felt ("Joe's Casino" and such). Though I'll probably just leave it be. I might still extend the bumper around to the back of the frame -- it'd be a quick fix.

You can see the full photo sets here: Halloween Costume Build 2008 and Fairfax Athletics Halloween Party, 10/25/08.

Lastly, thanks to Cockeyed.com's Rob Cockerham for the inspiration and instructions on how to build the harness and platform.

Labels: , ,

Building My Blackjack Dealer Halloween Costume (Part 1 of 2)

Unlike most previous years, I actually had an idea for a Halloween costume this time around, with enough time to actually follow through on it. [If you want to skip the build and go straight to the finished costume, well, I pity you.]

The Inspiration
A few weeks ago, listening to Zydeco music at an Oktoberfest celebration in Reston (note there are several things not quite right with that statement), I got to idly thinking about Texas Hold'em (I don't play Texas Hold'em -- I was probably being thankful that the fad is dying out), when I had a flash of inspiration: "Poker table Texas Hold em costume." (Oct. 11, 9:40pm -- I texted myself so I wouldn't forget.)

The idea was informed by (alright, stolen wholesale from) Cockeyed.com's Rob Cockerham's American Idol Judges Costume -- I'd been revisiting the site looking for costume ideas, since he usually manages to put together some great ones, and I wanted to make something wearable.

The Preparation
The very next day, I started gathering materials. In a fortuitous coincidence, Michael's had sheets of green felt and fabric paint on sale. (I also bought some foam core board, though I didn't end up using it.) Then, I went to Home Depot, and got some 1/2" PVC pipe, plywood and hardware.

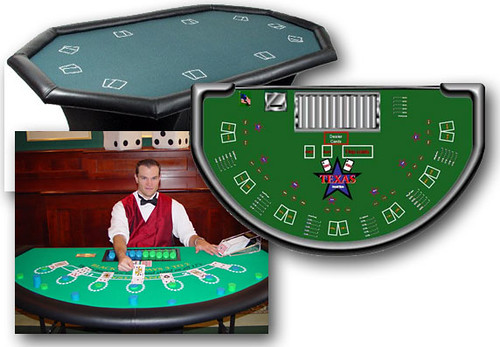
Only after starting my shopping, did I decide I needed to plan out my concept. For design inspiration, I did some searching for poker and card table images:

card-table-concepts

The red vest photo figured in pretty heavily -- I actually own a red vest I never wear (it makes me look like an Ace Hardware employee), but it was colorful and wide enough to cover a harness.

I also switched from poker to blackjack, since I know the rules better and it's less involved to play (this was going to be a functional costume).

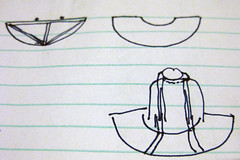
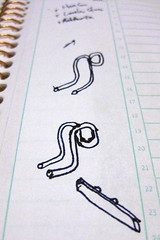
IMG_0266I followed up with very precise technical drawings.

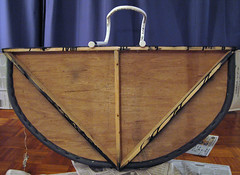
I'd started with a donut-half platform, but after looking at the photos, switched to the easier half-circle, supported on a triangular frame:


IMG_0267Then, following Rob Cockerham's lead, I sketched out the PVC harness. Originally, I thought I could bend the PVC arms underneath the platform to support it, but I couldn't see that working too well with the frame, so I'd connect the PVC to the back of the frame using pipe straps:


The Build
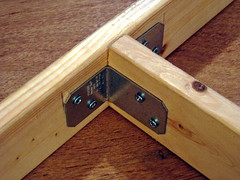
IMG_0180Over the next few days, I started building the frame and platform. One of the good things about having so much clutter around is having building materials and tools on hand. I built the frame out of some spare 1"x3" boards (left over from making bed slats):


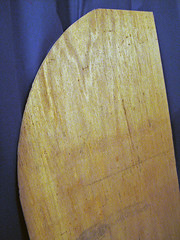
IMG_0179 Then, I used my Rotozip to cut the plywood in an arc (first drawing a circle with a pencil on a string).

I'd originally used a 2'x4' sheet of 3/8" MDF, but switched to 3/16" plywood to save weight.

It was my first time using the Rotozip as a plunge cutter (I've used it with the flex shaft as a big Dremel tool), and it was pretty easy to control.


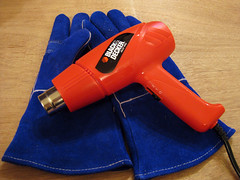
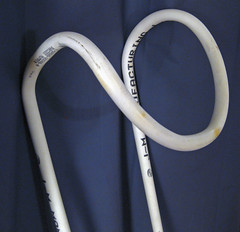
IMG_0181After that, I bent the PVC. I'd bought a heat gun and welding gloves just for the occasion:


IMG_0178The bending went a lot smoother than I'd expected. Granted, it wasn't perfect and you can see a few scorch marks, but it didn't kink and it was close enough for a first try:


IMG_0269After that was just assembly. I didn't feel like hammering, so I just used wood screws to finish the triangle frame and mount the plywood to it (using a stud finder) -- I did a rough miter box cut to get the angles (This photo is from this week, when I decided to paint some of the exposed parts of the frame. Also, you can see the PVC harness is a little crooked):


The Embellishment
IMG_0183I glued and cut the felt directly to the plywood without any problems.

One thing that I had been concerned about was how to build a cushioned bumper -- I'd been going around to hardware and auto supply stores looking for vinyl to make cushions, with no luck.

But then I remembered I had some extra foam pipe insulation sleeves -- they're long tubes, split down the middle. You wrap them around hot water pipes -- they even have self-adhesive strips, so they were perfect for the job.

In an inspired moment, I also remembered I had some electroluminescent wire (it's battery-powered and glows -- I'm always trying to find a reason to use it), which I stapled (carefully) along the edge of the new rail -- it's an eye-catching touch, especially in a darker room.

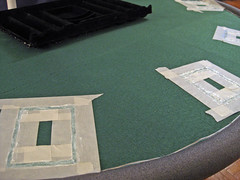
The most annoying part was masking and painting the card outlines. I used the fabric paint I'd bought, but my first try using the glow in the dark paint looked pretty bad in the light. I ended up mixing in some white paint, though it still glows a little bit.

The first cards were easy, but for the second cards (which touched the first cards), I ended up taping off the outside edge, then using a shiny business card to mask the inside edge. It worked well enough.

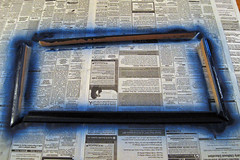
IMG_0182I wanted to do a sunken chip tray, but I would have had to cut into the board and frame, so I ended up using some shoe molding (also laying around) to build a frame. (I'd bought a 300-chip poker set at Target for 20 bucks -- the flimsy plastic chip tray lifted right out of the case, and I built the frame around it.)

I couldn't find my black paint, so I spray painted it navy blue (close enough) and glued it to the felt.

So, that was the build. Stay tuned for Part 2, to see how it all worked out. While you're waiting, here are the materials and tools used:

Materials
One 2'x4' sheet of 3/16" plywood [tabletop]
$5
Four 1'x3' boards (max length 3.5') [frame]
On hand
One 1/2" PVC pipe, 8' [harness]
$1.77
Two 1/2" PVC end caps (for neatness)$0.49 each
Pack of 20 1/2" 2-hole pipe straps [I used six]
$2.13
Two 1-1/2" Angle brackets [frame]
$.51 each
Assorted wood screws [all over]
On hand
One 8' 1/2" pipe sleeve [bumper rail]
On hand
Six sheets of 12"x18" felt [playing surface]
$0.33 each
Fabric paint [playing surface]
$0.99 each
Shoe molding [chip tray]
On hand
300 chip poker set [duh, though you can get by with less]
$17.99
8' battery powered EL wire from IKEA [optional]
On hand

Tools Used
Heat gun ($24.99), leather welding gloves ($9.99), Rotozip cutting tool, hacksaw (to cut the PVC pipe), cordless drill driver, stud finder, measuring tape, cross cut saw, miter box, 4-way file, staple gun, wood glue, spray paint, masking tape.

Labels: ,

Tuesday, September 02, 2008

Making My Wallet Thinner

One of the unexpected lessons from the Virgin Festival this year was rediscovering how thin my wallet is when I take all of the shit out of it. (Related: there's a lot more room in the back of my car when I take all the shit out of that, too.)

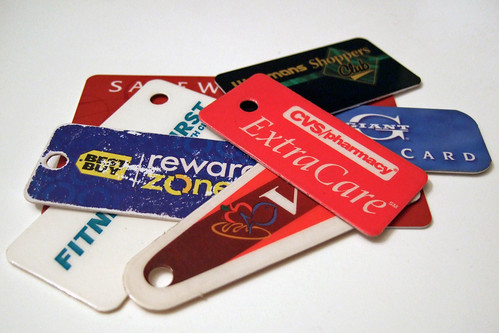
It's regained a little bit more of its thickness since then, but one thing's that helped was consolidating my frequent buyer cards -- I'd gotten up to six (plus my gym card). Even using the smaller key tags (which I don't put on my keychain, which has enough stuff on it), they still take up a lot of room:

DSCF5589
Wallet cruft. Like ephemera, except more annoying.

Now, a year or two ago, there was a Digg item about a card consolidation site (www.justoneclubcard.com), where you pick the stores you need from a drop-down and type in the account numbers, and it'll generate the barcodes on a printable, wallet-sized card. Pretty nifty.

At the time, it didn't support all the places I needed, though now it's pretty comprehensive. Of course, it doesn't have my gym, so I decided to make my own.

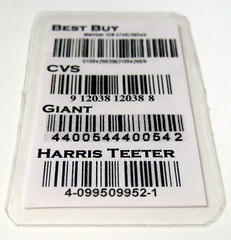
Not having an iPhone (and really, saving digital pictures of your club cards on your iPhone so you can run the on-screen image over the laser scanner seems kind of... perverse), I went lower-tech -- I threw the cards on my printer/scanner (you could also use a camera, carefully), adjusted them in Photoshop to print to twice the size of a business card, then folded the resulting paper in half to make a two-sided, wallet sized card:

DSCF5586
Attention miscreants: The numbers are dummied up.

The sloppy lamination is just using those no-heat laminating stickers from any office supply store. And I saved the layered PSD file in case I need to make future changes.

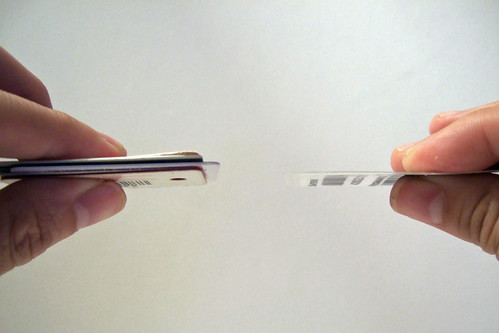
Here's a closeup showing the difference in thickness (more or less):

DSCF5588

I haven't had any problems with it so far.

Anyway, it's just a little silly wallet space-saver so I have more room for more fat wads of bills. And my way was kind of a pain -- if justoneclubcard.com has all the places you need, just do that, it's easier.

Then again, I suppose you can save even more space by going the functional tattoo route. But save that for the Google/SkyNet work camps.

Labels: , ,

Wednesday, May 07, 2008

Poor Joelogon's Steadycam (or is it Joelogon's Poor Steadycam?)

As I Twittered yesterday, I completed my Poor Man's Steadycam (I'd bought the parts on Monday, for slightly over the advertised $14), without too much trouble. (Well, after I twigged to the fact that the cheap drillbit I was using was never going to be able to drill a hole through galvanized steel. It only took me 45 minutes and one battery to figure out I needed to switch bits.)

Here it is:

You're doing it wrong
I may not be using the $14 Steadycam in the prescribed fashion.

Actually, here it is when held as intended:

$14 Steadycam
My Macbook's iSight camera is really noisy.

Now, I haven't had the chance to really test it yet, so I haven't posted any video using it. Also, I don't own a dedicated video camera right now, and the rig looks pretty ridiculous with my Fujifilm Finepix F30 digital camera (which doesn't even weight half a pound) mounted on it.

It feels a little heavy to try to skate around with -- maybe I'll try building a version using PVC pipe, or try a PVC Fig Rig.

Tags:

Labels: ,